In this article help us to setup the Code Review tool for android.
Installing PMD
First, we need to install the PMD Eclipse plugin by following the instructions on the plugin page. Goto Help> Install New Software > Click Add

Add the link : http://pmd.sf.net/eclipse

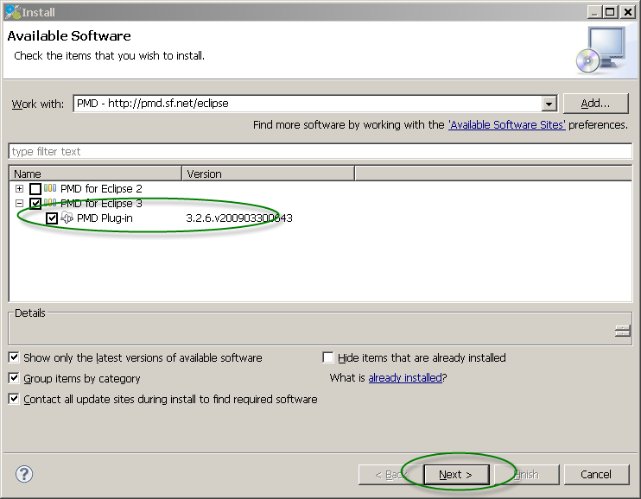
Install the PMD for Eclipse 3
Configure PMD your project
1. In the project properties, select the PMD page. Enable PMD needs to be checked to run PMD automatically. Otherwise, you will need to manually start PMD each time you want to check your code using the PMD submenu and older violations will not be removed automatically once you fix your code, you will need to use the clear violations in the PMD submenu.

2. The “Handle high priority violations as errors” property needs to be unchecked. This is a new property in the 3.2.6 version of the PMD eclipse plugin. When that option is checked, the Android plugin will refuse to deploy your application if the project contains high level violations. So unless you have a development rule stating that there should be no high level violations in your project at any time, this option should be disabled.
3. With that setup, PMD will be enabled but it will be using the default ruleset shared by all projects in the workspace and that is not really adequate for Android development. To define a specific set of rules for your project, check the last box on the PMD page to create a file named “.ruleset” at the top level of your project. The configuration is now complete, press “OK” and then select “Yes” on the next popup.
4. Ensure the .ruleset and .pmd files has been created successfully.

5. Check the Code using the PMD
Select the Project and rightclick and select PMD > Check Code With PMD

6. check the Result in the Violations Overview.


Installing PMD
First, we need to install the PMD Eclipse plugin by following the instructions on the plugin page. Goto Help> Install New Software > Click Add
Add the link : http://pmd.sf.net/eclipse
Install the PMD for Eclipse 3
Configure PMD your project
1. In the project properties, select the PMD page. Enable PMD needs to be checked to run PMD automatically. Otherwise, you will need to manually start PMD each time you want to check your code using the PMD submenu and older violations will not be removed automatically once you fix your code, you will need to use the clear violations in the PMD submenu.
2. The “Handle high priority violations as errors” property needs to be unchecked. This is a new property in the 3.2.6 version of the PMD eclipse plugin. When that option is checked, the Android plugin will refuse to deploy your application if the project contains high level violations. So unless you have a development rule stating that there should be no high level violations in your project at any time, this option should be disabled.
3. With that setup, PMD will be enabled but it will be using the default ruleset shared by all projects in the workspace and that is not really adequate for Android development. To define a specific set of rules for your project, check the last box on the PMD page to create a file named “.ruleset” at the top level of your project. The configuration is now complete, press “OK” and then select “Yes” on the next popup.
4. Ensure the .ruleset and .pmd files has been created successfully.
5. Check the Code using the PMD
Select the Project and rightclick and select PMD > Check Code With PMD
6. check the Result in the Violations Overview.
superb tool dude..... thanks.....
ReplyDeleteNice one..
ReplyDelete